Introduction:
In an era of increasing environmental consciousness and rising energy costs, many homeowners are turning to solar power as a sustainable and cost-effective solution. Going solar not only helps reduce your carbon footprint but also allows you to generate your own clean energy. If you’re considering making the switch to solar power, this step-by-step guide will walk you through the process, from initial planning to enjoying the benefits of solar energy.
Step 1: Assess Your Energy Needs
Before diving into the world of solar power, it’s crucial to determine your energy requirements. Analyze your electricity bills to understand your average consumption and identify any areas where you can reduce energy usage. This evaluation will give you a better idea of the size of the solar system you’ll need.
Step 2: Research and Choose a Solar Installer
Finding a reputable solar installer is key to a successful solar journey. Research for local solar company in Lahore or around your area, read customer reviews, and compare quotes to find the best fit for your needs. Look for installers with relevant certifications and experience in solar panel installations.
Step 3: Schedule a Solar Consultation
Once you’ve narrowed down your choices, schedule a consultation with a solar installer. During this meeting, they will assess your property, analyze your energy needs, and provide you with a detailed proposal. Use this opportunity to ask questions and ensure you have a thorough understanding of the entire process.
Step 4: Solar System Design and Permitting
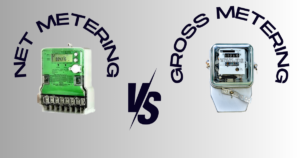
After finalizing the solar installer, the solar installer will design a system customized to your energy needs and property specifications. They will also handle the necessary permits and paperwork required for the net metering / green meter. Make sure to review the design and obtain any required permits before moving forward.
Step 5: Installation Day
On installation day, the solar installer’s team will arrive at your property to install the solar panels, inverters, and other necessary equipment. The timeline for installation may vary depending on the size of the system and complexity of the project. It’s important to ensure the installer adheres to all safety standards during the installation process.
Step 6: Inspection and Interconnection
Once the installation is complete, a utility inspector will visit your property to inspect the system and ensure compliance with respect to net metering regulations. Following the inspection, your installer will coordinate with the utility company to establish the interconnection between your solar system and the electrical grid.
Step 7: Monitoring and Maintenance
After your solar system is up and running, it’s essential to monitor its performance regularly. Many solar systems come with monitoring tools that allow you to track energy production and detect any issues promptly. Additionally, schedule routine maintenance to ensure the system operates efficiently and maximize its lifespan.
Step 8: Enjoy the Benefits of Solar Energy
Congratulations! You’ve successfully gone solar. Sit back, relax, and enjoy the numerous benefits of your solar investment. Not only will you significantly reduce or eliminate your electricity bills, but you’ll also contribute to a cleaner and more sustainable future.
Conclusion:
Going solar is a rewarding journey that allows you to harness the power of the sun while minimizing your impact on the environment. By following this step-by-step guide, you can navigate the process with confidence and find a solar solution that suits your needs. Embrace the renewable energy revolution and take the first step towards a brighter and greener future for yourself and future generations.